Instance Administration and Configuration
Lasso Server provides a convenient, web-based interface for configuring a Lasso instance’s settings, managing and maintaining databases, and much more. This interface is referred to as the Lasso Server Admin.
Accessing Lasso Server Admin
Lasso Server can have multiple independent instances defined within Lasso Instance Manager. Requests are distributed to each host based on the value of each request’s Host header.
The default instance will catch all incoming web requests. If no additional instances have been created, Lasso Server Admin for the sole instance can be accessed using any domain name pointing at the server that’s enabled for Lasso Server. (Use “localhost” if accessing Lasso Server Admin from a browser on the same machine Lasso Server is installed on. Otherwise, replace “www.example.com” with the server’s actual domain name or IP address.)
http://localhost/lasso9/admin
http://www.example.com/lasso9/admin
To access Lasso Server Admin for a particular instance, it is necessary to construct a URL that meets the criteria for the instance. For example, if an instance only serves requests for the domain “secure.example.com” then the following URL would load the Lasso Server Admin for that instance:
http://secure.example.com/lasso9/admin
The web browser should prompt for the administrator username and password using a standard HTTP authentication prompt. The web browser will not prompt if Lasso Server Admin has already been accessed using the browser in the current session or if the authentication information has been stored in a keychain, passport, or browser preferences.
If an error is displayed, make sure Lasso Server and the web server are running as described in the installation instructions for your operating system elsewhere in this guide.
User Interface
All settings for a particular instance are configured here.
System Status
The System Status tab, located in the top right portion of the page, contains information regarding the Lasso Server instance.
- Uptime – length of time the instance has been running
- CPU Time – how much CPU time has been consumed by the instance
- Threads – number of threads in use by the instance
- Memory – amount of memory consumed by the instance
- Free – memory Lasso has been allocated but is not currently using
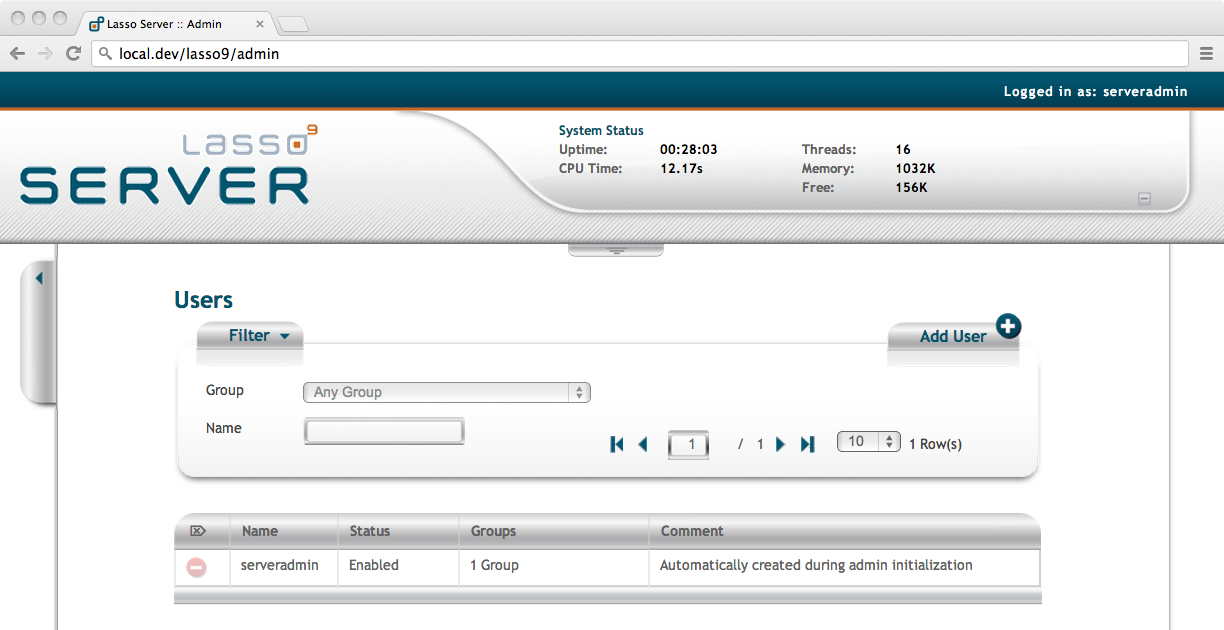
Lasso Server Admin – Landing Page and System Status
Lasso Quick Code
Lasso Quick Code allows running code snippets within the Lasso Server Admin web interface. The Lasso Quick Code console can be opened by clicking the arrow tab in the top center of the page.
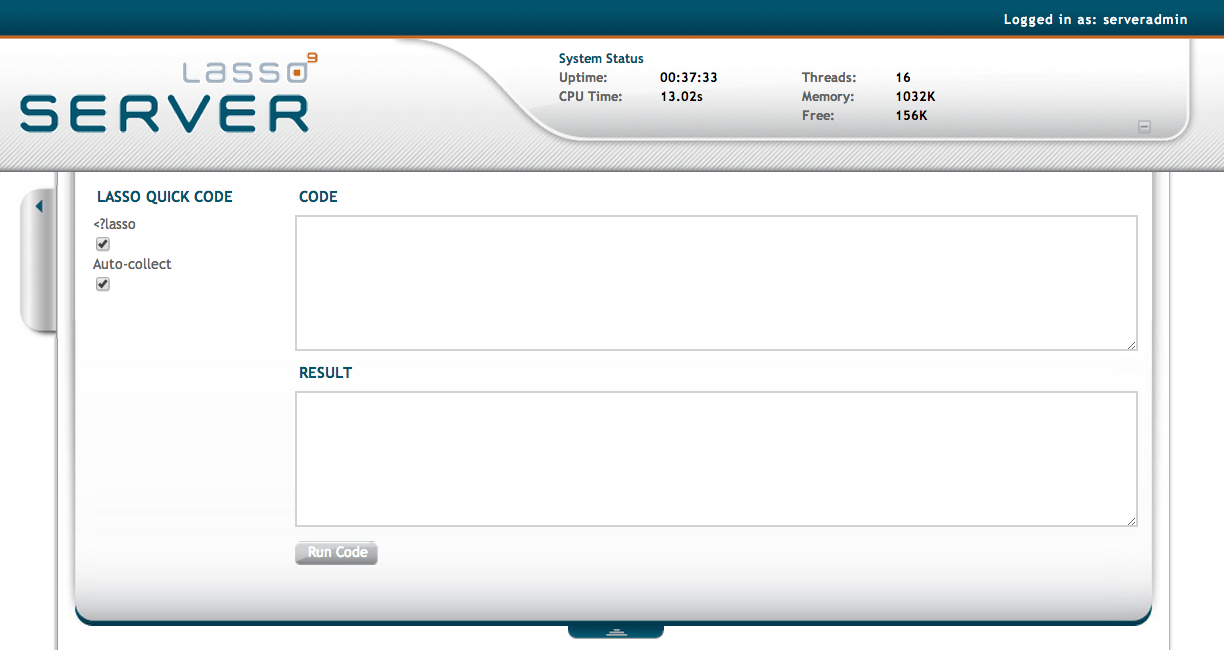
Lasso Server Admin – Lasso Quick Code
The Lasso Quick Code console has two configurable options:
- <?lasso –
When this option is checked, anything entered in the “Code” field is treated
as having been wrapped in
<?lasso ... ?>delimiters. - Auto-collect – When this option is checked, the Lasso Quick Code console will display the results of auto-collecting the code in the “Result” field.
Main Menu
The Lasso Server Admin is primarily navigated by using the pop-up menu on the upper left portion of the page. This is the “Main Menu” which contains the following divisions and options:
- Lasso
- Datasources – Configure database connections.
- License – Enter license serial number. (This can also be entered in Lasso Instance Manager.)
- Auth
- Users – Configure Lasso users.
- Groups – Configure Lasso groups.
- Monitors
- Log Book – View log messages and configure logging settings.
- Email Queue – View emails currently in queue.
- Sessions – View active sessions, delete expired sessions, and change session storage settings.
- Utilities
- DB Browser – Manage and browse databases.
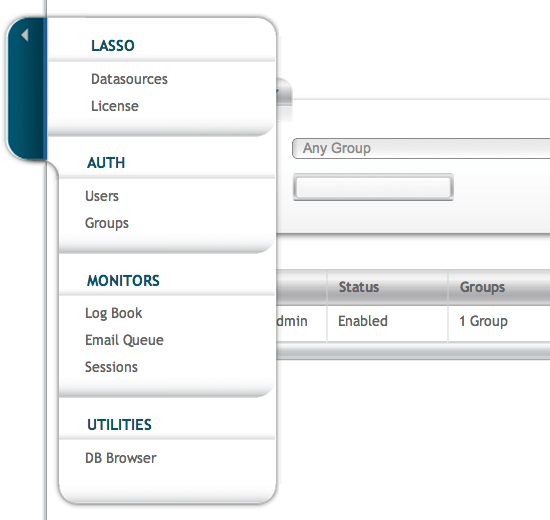
Lasso Server Admin – Main Menu
Administrative Tasks
Each of the links in the Main Menu leads to different sections in Lasso Server Admin to perform specific administrative tasks. These tasks are outlined in the sections that follow.
Configuring Datasources
Clicking on the “Datasources” link in the Main Menu will lead to a web page that lists the datasources your instance can access. Clicking on a data source will reveal a list of hosts that have already been configured as well as an Add host button. Clicking on that button reveals a form to enter the “Host”, “Port”, “Username”, and “Password” information for a new host. Entering this information and clicking Add Host will add the new host to the list of hosts for that data source.
Clicking on a host in the list of hosts for a data source will reveal a form that allows editing the connection information for the host or to delete the host. Below that form is a list of databases that the credentials entered can access.
Clicking on a database reveals a form that allows the alias name for that
database to be set. The alias name is what is matched when the -database
parameter is used in an inline method. Below that form is a list of tables in
the database that the entered credentials can access.
See the Datasource Setup chapter for detailed information on connecting Lasso Server to various data sources.
Entering a License Serial Number
Clicking on the “License” link in the Main Menu will lead to a web page that displays the current license of the instance. There is also an Add Serial Number button that allows adding or changing the serial number. This information can also be viewed and updated in Lasso Instance Manager.
Managing Lasso Users
Clicking on the “Users” link in the Main Menu will lead to an interface that
allows adding, removing, and searching for Lasso users. Lasso users are stored
in the instance’s internal SQLite databases. Each user has a name, password, and
a status (enabled or disabled). They can optionally have a comment and belong to
one or more Lasso groups. These users can be used with the auth_… methods
for HTTP authentication.
During the initial installation and setup of the instance, Lasso Server Admin creates a user in the “ADMINISTRATORS” group and authenticates anyone trying to access itself against those credentials. Be sure you don’t delete this user without first creating another user in the “ADMINISTRATORS” group. In fact, you should always have at least one administrator that can log in to Lasso Server Admin.
Search for a User
You have two ways to filter the list of Lasso users to find the user(s) you are seeking. You can filter users based on their membership in a group by selecting a group in the Group drop-down list. Changing this selection will cause the list of users to update itself based on the criteria you have selected. You can also search for a user by name by typing part or all of the name in the “Name” text field. As you type, the list of users will filter itself based on the data you enter.
Add a User
To add a Lasso user, click the Add User button in the top right of the “Users” interface. A dialog will appear for entering the name, password, and a comment as well as selecting the status and which groups they should be a member of. Once all the data is correctly entered, click the Add button to add the user.
Delete a User
To delete a user, first find the name in the listing of users. Once you have found the user, click the minus button in the column to the left of the name. You will receive a dialog box double-checking your intentions. Click the OK button in that dialog box to delete the user.
Managing Lasso Groups
Clicking on the “Groups” link in the Main Menu will lead to an interface that
allows adding, removing, and searching for Lasso groups. Lasso groups are stored
in the instance’s internal SQLite databases. Each group has a name and a status
(enabled or disabled). They can optionally have a comment. These groups can be
used with Lasso users and with the auth_… methods for HTTP authentication.
During the initial installation and setup of the instance, Lasso Server Admin creates a group named “ADMINISTRATORS” and any user assigned to that group can authenticate into Lasso Server Admin. There is also a special group named “Any Group” that will appear in the “Users” interface of Lasso Server Admin. This is a way to reference every user since everyone is a member of this special group.
Search for a Group
You can filter groups based on their names by typing part or all of the name in the “Name” text field. As you type, you will notice the list updating itself based on the data you enter.
Add a Group
To add a Lasso group, click the Add Group button in the top right of the “Groups” interface. A dialog will appear for entering the name and a comment as well as selecting the status of the group. Once all the data is correctly entered, click the Add button to add the group.
Delete a Group
To delete a group, first find it in the listing of groups. Once you have found the group, click the minus button in the column to the left of its name. You will receive a dialog box double-checking your intentions. Click the OK button in that dialog box to delete the group.
Monitoring and Managing Lasso Logs
Clicking on the “Log Book” link in the Main Menu will lead to an interface for
managing the instance’s Log Book. The “Log Book” interface allows viewing and
delete errors, warnings, detail messages, and deprecated functionality warnings
that have been logged by Lasso Server via the log_… methods. This interface
can also specify the site’s logging settings.
Note
Configuring error logging in Lasso Server Admin is not the same as configuring page-level error handling, such as for syntax errors and security errors. Page-level error handling is described in the Error Handling chapter.
Filter Log Messages
You can filter log entries based on their message by typing part of the message in the “Message” text field. As you type, the list of log messages will filter itself based on the data you enter.
Delete Log Messages
There are two action buttons below the log entries table:
- Delete All Messages – delete all log entries stored in the SQLite database
- Delete All Found – delete all log entries that have been found based on the search term in the “Message” text field above
Log Book Settings
Click on the Settings button at the top right of the “Log Book” interface. A dialog will appear with a matrix of checkboxes that allows selecting where each type of log message is sent. Make your selections, then click the Save button to update the instance’s logging settings.
Monitoring and Managing the Email Queue
Clicking on the “Email Queue” link in the Main Menu will lead to a web page
displaying the instance’s email queue. The email queue logs all email messages
that are being sent from the instance. Messages remain in the queue while they
are being sent to the SMTP mail server looked up by Lasso or specified in the
email_send method by the developer. For more information, see the
Sending Email chapter.
Filter Email Messages
You can filter the email messages being displayed in the queue by their status: “Any”, “Queued”, “Sending”, or “Error”. Simply choose one of those statuses from the Queue Status drop-down list and the queue entries will automatically update to reflect your selection.
Delete Email Messages
To remove an email message from the queue, first find it in the listing of entries. Once you have found the message, click the minus button in the column to the left of its ID. You will receive a dialog box double-checking your intentions. Click the OK button in that dialog box to remove the message from the queue.
Managing Lasso Sessions
Clicking on the “Sessions” link in the Main Menu will lead to an interface that allows browsing and managing sessions in real time as well as configuring the location for storing sessions.
View Sessions
Sessions can be stored in any of the available data sources for your instance of Lasso Server as well as in memory. The default is to use a SQLite database and table to store session information. You can view the session information you have stored in any of the data sources by selecting the data source from the Driver drop-down list and then selecting the appropriate values in the Database and Sessions Table drop-down lists if appropriate. (These last two lists will be disabled for the “SQLite” and “In Memory” drivers. Otherwise, they will show the databases/tables you have access to for the selected driver’s data source.)
Delete Expired Sessions
Clicking the Delete Expired Sessions button beneath the Driver drop-down list will remove all expired session entries from the currently selected session data source’s table. By default, Lasso Server periodically clears out expired sessions, so it is not usually necessary to run it manually.
Configure Session Storage Location
By default, Lasso Server is configured to store session information using the “SQLite” session driver. You can change this by following these steps:
- Select the driver you wish to use from the Driver drop-down list.
- If the driver is not “SQLite” or “In Memory”, select a value from the Database drop-down list and the Sessions Table drop-down list. (You can click the Create Sessions Table button below the Sessions Table drop-down list to have Lasso Server create a table in the selected database with the correct schema for storing sessions. If you click this button, you will be given the chance to name the table whatever you desire, and then that new table will be selected in the Sessions Table drop-down list.)
- Click the Select As Default Driver button to have the
session_startmethod use your selection for storing session information.
Browsing Data Sources
Clicking on the “DB Browser” link in the Main Menu will lead to an interface that allows issuing SQL queries to accessible SQL databases. This includes any SQLite, MySQL, or SQL-compliant ODBC database that has been set up in the “Datasources” interface of Lasso Server Admin.
Browsing data is as easy as selecting the appropriate values in the
Datasource, Host, Database, and
Table drop-down lists. Lasso Server Admin will automatically issue a
SELECT * on the chosen table and display the results in the table below.
You can run your own SQL statements on the chosen host/database/table by entering them in the provided “Statement” text area and clicking the Issue Statement button below the text area. The results will be shown in the table below. If there are any errors in your SQL statement, an alert message will inform you of the error, and no results will be displayed.